Speedbumps for Electricity
Did you know that different colors of LEDs require different amounts of power to turn on? This is especially true for bare through-hole LEDs (the ones with legs).
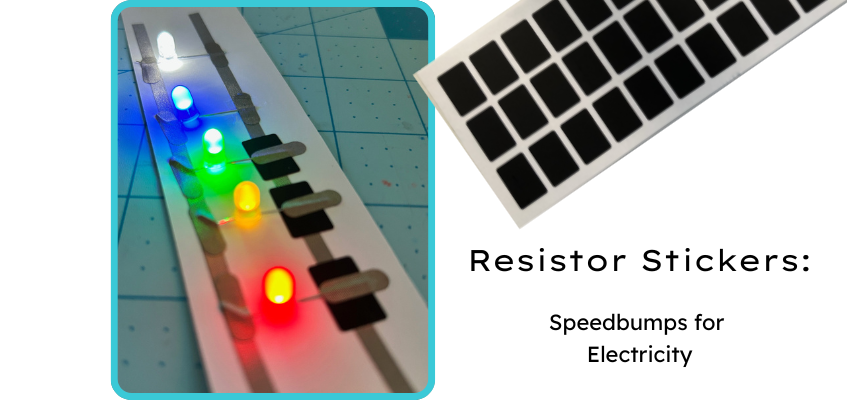
In this post, you’ll learn how to use Chibitronics NEW Resistor Stickers to act as speedbumps to slow down the flow of electricity in your paper circuits.
Unlike Circuit Sticker LEDs and Launchpad LEDs, which come with built-in resistors, our NEW Chibitronics Through-Hole LEDs do not have built-in mechanisms to help slow down the flow of electrons.
As a result, warm and cool colors don’t always play nicely together within the same circuit, with the warmer colors hogging up the energy for themselves.
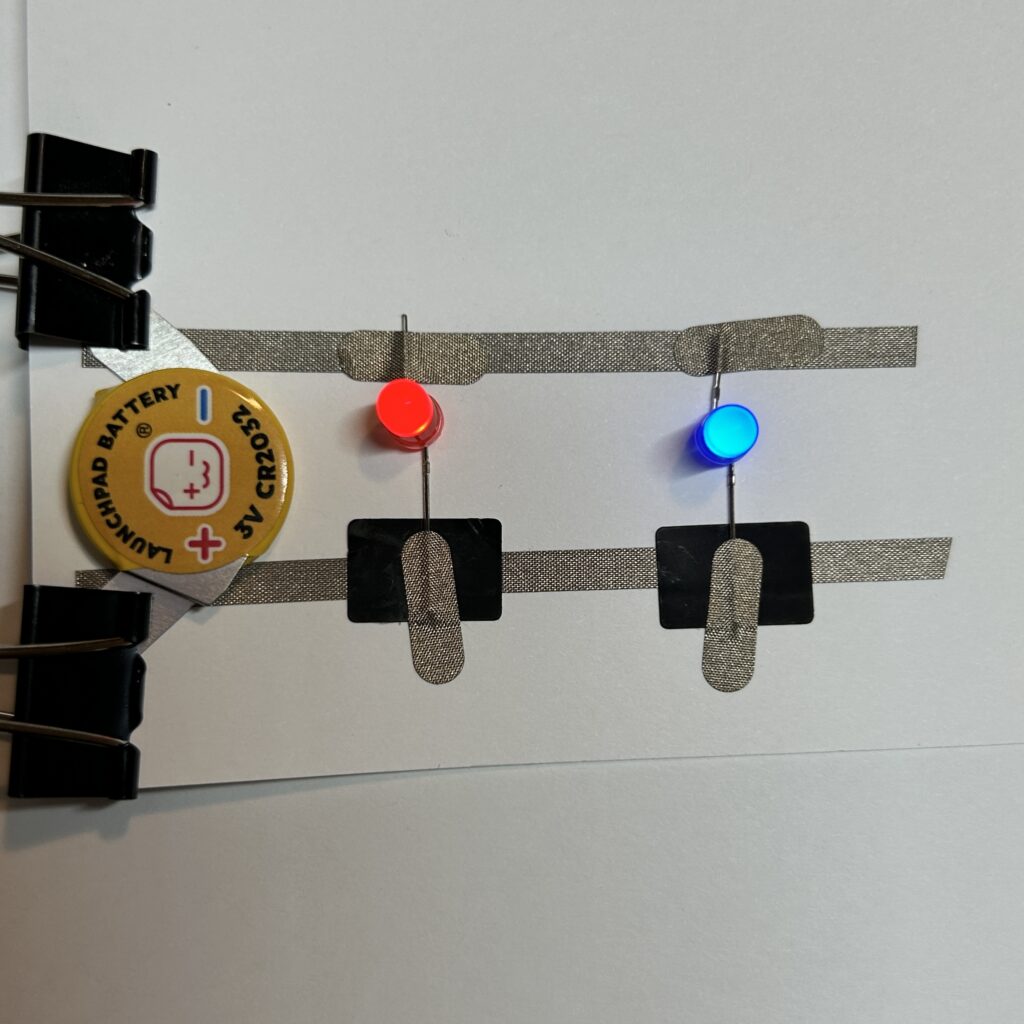
For example, if you try to pair a red through-hole LED with a blue or white one, the blue or white one will not always turn on. This is because a red LED requires less power than a blue or white one.
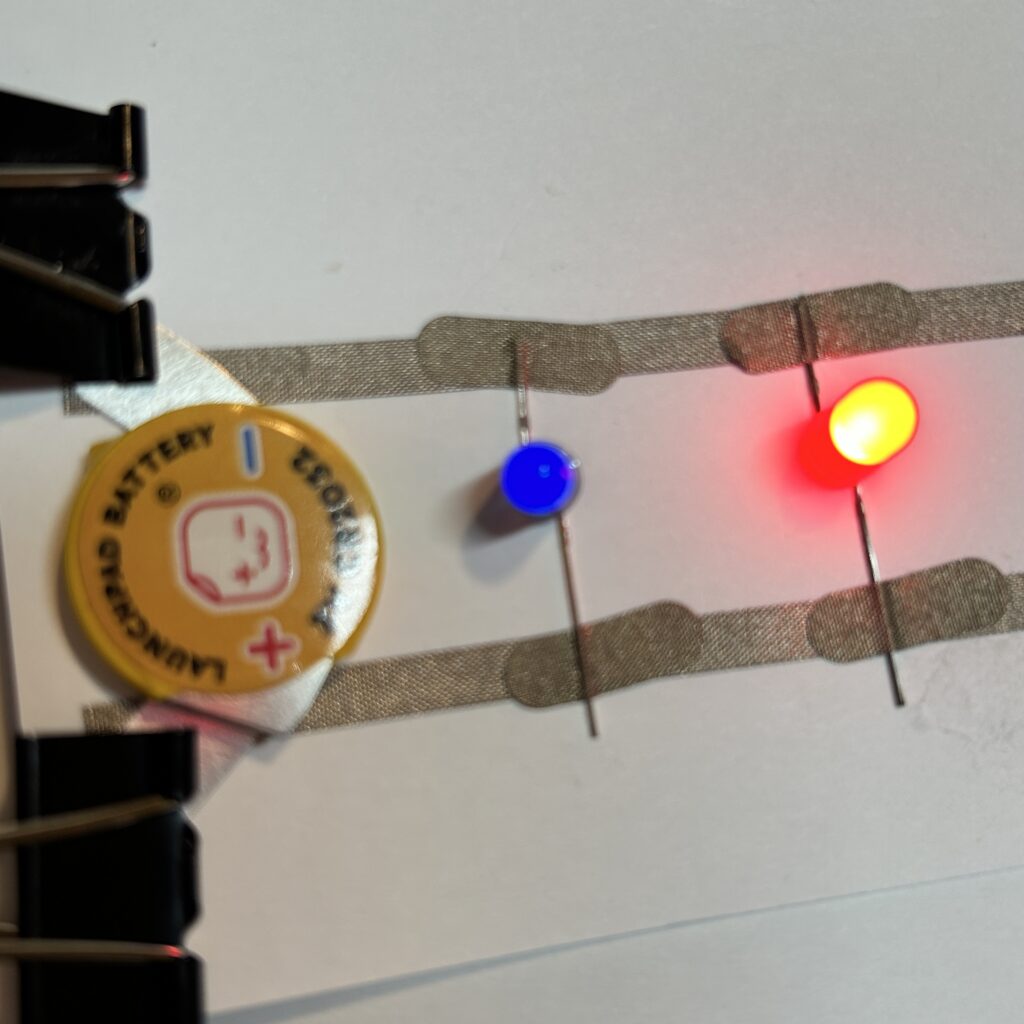
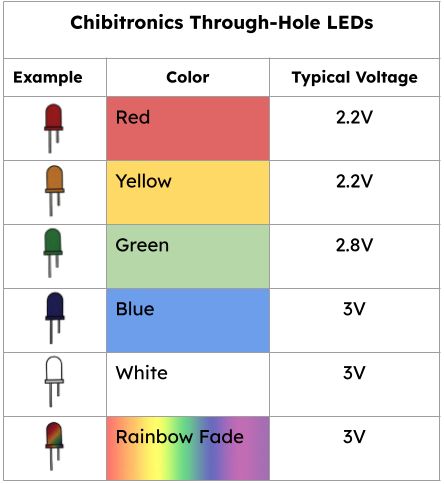
In the sequence of visible colors on a light spectrum—which follows the familiar convention of the rainbow, ROYGBIV—voltage requirements for LEDs start low and increase as they advance through the spectrum. While these values may differ a bit (depending upon the manufacturer) this chart shows the typical voltage of Chibitronics Through-Hole LEDs, the amount of power that’s typically required for each color to light up.
As a general rule, red and yellow LEDs (warm colors) require less power than green, blue, and white ones (cool colors).
To prevent frustration when using bare through-hole LEDs, or when working with students, it’s a good idea to separate the warm colors from the cool colors when building paper circuits. This is especially helpful if you don’t have access to resistors.
Tech Tip
Did you know that the voltage of the battery actually drops to match the voltage requirement for the least power-hungry LED within a circuit?
Electrons are lazy and will always take the path of least resistance. Because a red LED is easier to light up than a blue one, due to its lower power requirements, the overall voltage in your circuit will also drop to that lower voltage. This drop in voltage across the entire circuit will result in insufficient power to light up a blue LED.
But, there is a way to slow down the flow of electricity and add balance to your circuits, enabling you to light up all of your through-hole LEDs (assuming your battery has enough capacity)!
View Video Tutorial
Using resistor stickers to balance and mix colors
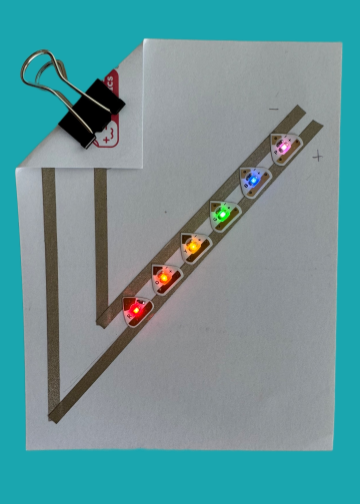
If you’d prefer to build a mixed-color circuit where all of your through-hole LEDs turn on, you can try adding some resistance to the circuit loop to help balance out the power requirements for each of the colors.
Resistance is kind of like a tap on a faucet, like friction for electricity. Basically, it helps slow down the flow of current (the flow of electricity) to help protect your circuit and prevent your battery from draining too fast. If you think of the voltage in your battery as the pushing force that pushes power through your circuit, and current as the actual flow of energy that creates the light, resistance slows things down, like a speed bump in your circuit.
Our NEW Resistor Stickers, which look like little black rectangles, work in much the same way as traditional resistors.
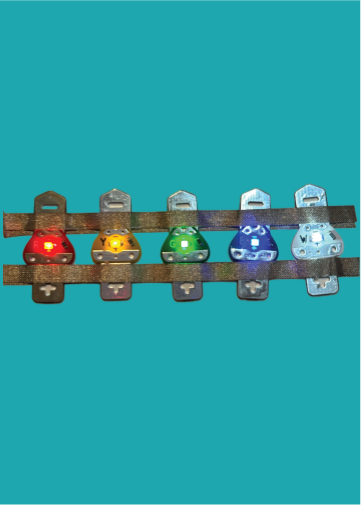
Basically, they help slow the flow of current—the flow of electricity—to help protect your circuit. By slowing down the current, Resistor Stickers help keep your through-hole LEDs from burning out and your battery from draining too quickly. By helping to balance the varying voltages of LEDs in your circuits, using them will allow you to light up all of the through-hole LEDs in your circuits, regardless of their color (as long as your battery has sufficient charge to do so)!
Resistors Slow & Balance the Flow of Current
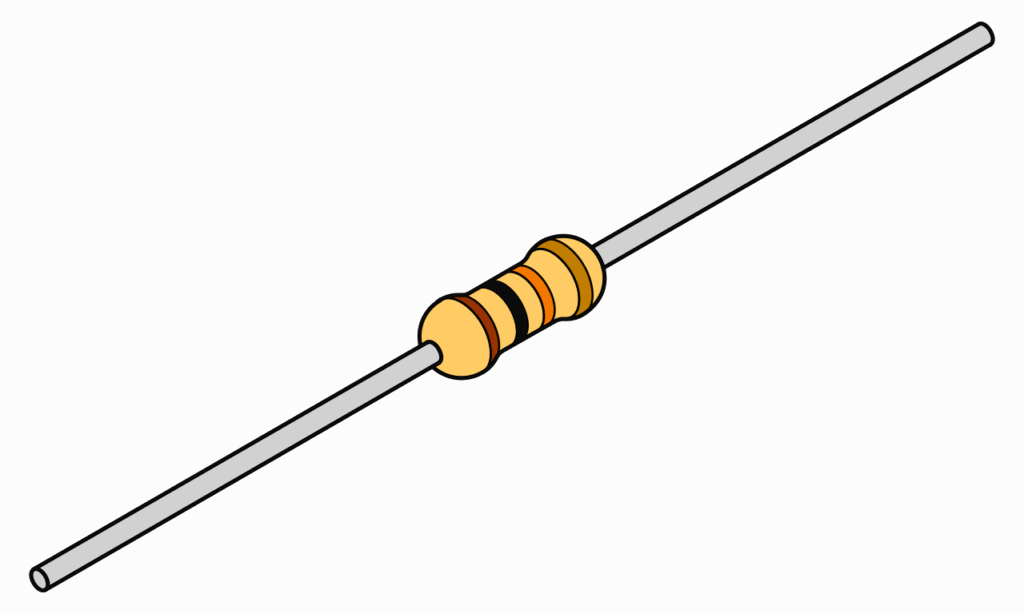
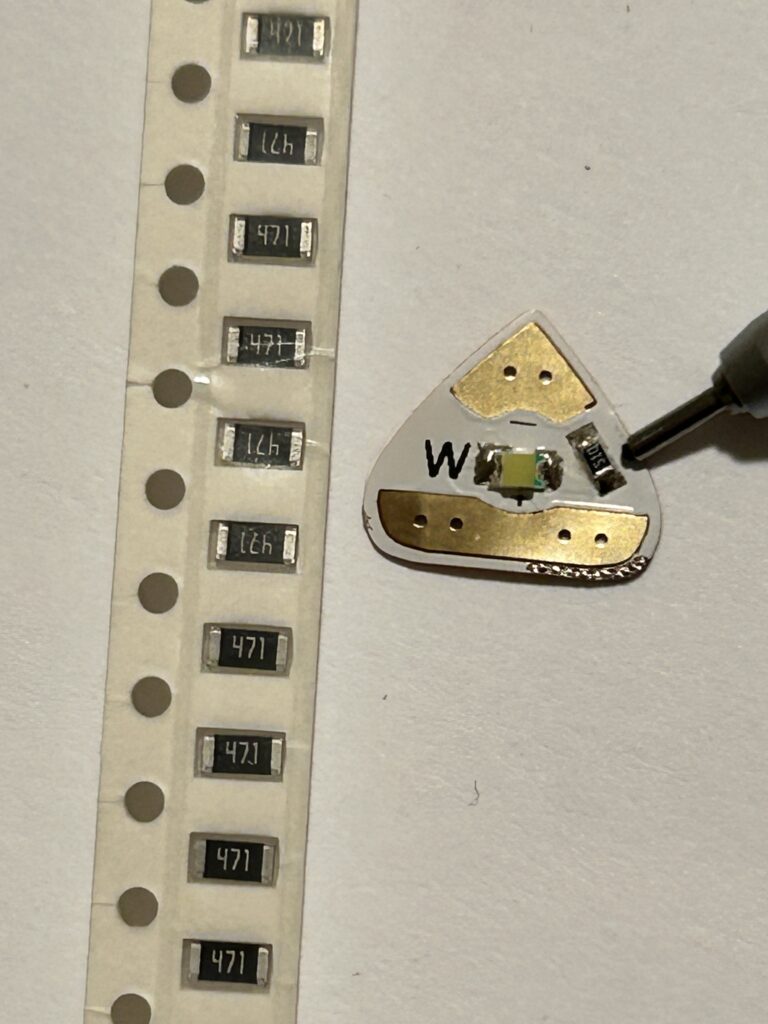
| Resistor Sticker | Through-Hole Resistor | Surface Mounted (SMD) Resistors |
| Chibitronics Resistor Stickers are flat, self-adhesive rectangles made of a conductive black material that are useful for slowing and balancing current in paper circuits. They have a standard resistance of 500 ohms. | Through-hole Resistors are thin banded cylinders with metal legs that can go into the holes of a breadboard. With a bit of finesse, they may be soldered or taped into a paper circuit. Their colors, sizes, and values vary, but a 250 ohm resistor works well for paper circuits. | Surface Mounted (SMD) Resistors are tiny, flat chips that are soldered to Circuit Sticker LEDs, Launchpad LEDs, and a range of other microelectronics. Their sizes, shapes, colors, and values vary. |
Made of a flexible base material imbued with carbon (which is conductive) our NEW easy-to-use Resistor Stickers are conveniently backed with conductive adhesive. Nearly magical in function, they work the same way as a typical resistor!
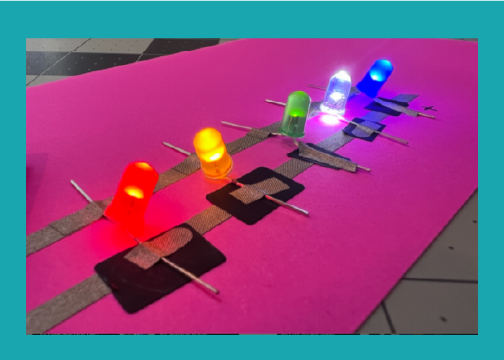
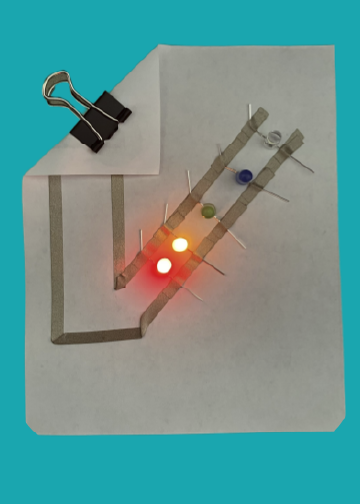
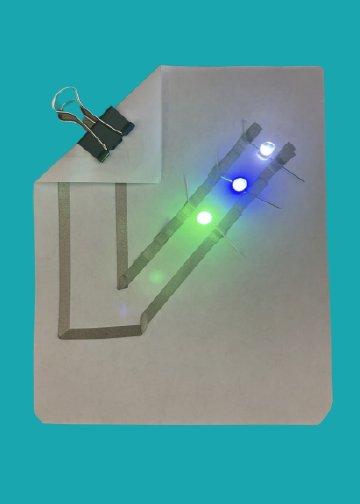
By sandwiching a Resistor Sticker between the leg of a through-hole LED and one of the conductive traces of your circuit, you’re adding resistance to the loop that the electrons are flowing through. As a result, you’re slowing down the current going through that LED and making it more difficult for the electrons to pass through it. This helps to prevent the LED from hogging power away from other LEDs.
Since a resistor is like a switch, it does not have a direction or a polarity like an LED or a battery does. This means that you can put a Resistor Sticker under either leg of a through-hole LEDs (positive or negative); it doesn’t matter as long as you only place it under one leg. Then, if securing the leg of your LED to it with Conductive Fabric Tape, be sure that the tape does not come in contact with the conductive trace leading to the battery.
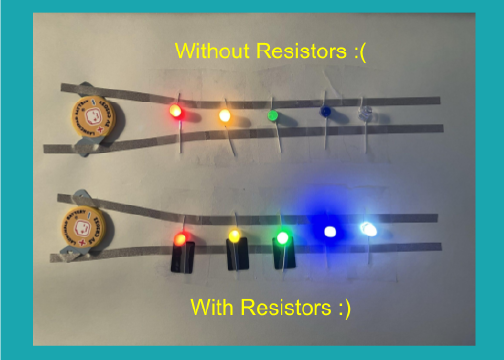
As you repeat this process for each of the low energy colors in your circuit, you’ll notice that the overall current will start to balance out, siphoning away enough power to allow the green, blue, and white LEDs to turn on!
Unlike through-hole and surface mounted resistors which vary in value, Resistor Stickers have a consistent value of approximately 500 ohms across the sheet. While they may not provide a perfect balance for the current in your paper circuits, we like to think of them as training wheels for resistors. Our accessible, easy to use Resistor Stickers will enable all of the colors in your paper circuits to get along, play nice, and share. If only everything in life was so easy!